Windows Server 2022 Active Directory Home Lab Part 3: Virtualization using Hyper V
Before beginning this part of the lab, I should mention this lab topic is a little complicated to cover, but manageable. The reason why is simple, Virtualization is like putting a clown car inside your computer…one machine, endless passengers. My “computer” in this lab is a virtual machine, so the “clown car” that’s being put in my computer (and therefore making it feel funny when active) is basically just another machine that consumes what limited resources my Virtual Machine already has. This is called “Nested Virtualization” and is typically carried out when one is testing cloud setups or doing labs with a computer that has significantly more resources available than mine does, though you still can do it through a Type 2 Hypervisor; in order to do so, just enable “Nested Virtualization” on the host and it should work in the Virtual Machine. Again, since I don’t have the resources, in this lab, I won’t actually perform “Nested Virtualization”, but I can explain how to set it all up.
The first thing to do is to go to the Server Manager upon bootup and then go to “Add roles and features wizard” as we have the past two steps, and click “Next” until you reach the “Server roles” area; then select the “Hyper V” role. Before going further, for those that dont know Hyper V is Microsoft’s Virtualization platform that comes standard on Windows Server 2022. It is a Type 1 Hypervisor which means it runs on the host’s hardware rather than inside another operating system. In turn, this gives better performance compared to Type 2 Hypervisors like VMware, or VirtualBox. You can also find it on every Windows 10 and 11 edition except the “home” editions. Therefore, chances are high it can be installed on your own OS. If the OS checks out, you can run this Command as an Administrator in Windows PowerShell to save time: “Enable-WindowsOptionalFeature -Online -FeatureName Microsoft-Hyper-V -All.” There is a similar command you can use in Windows Server 2022, but I thought it would be easier to show installation through a GUI. Anyway, once the checkbox is checked next to Hyper-V, chances are, you will get the following error.
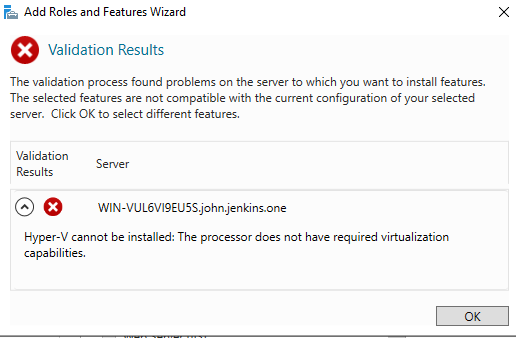
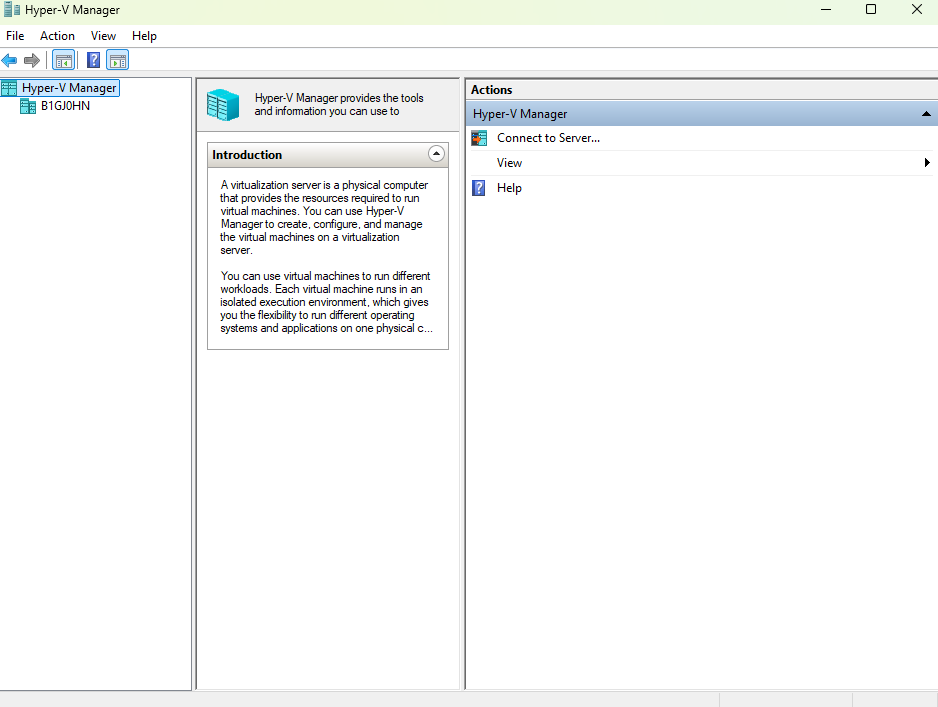
If you do get this error, its because “Nested Virtualization” is not enabled, and therefore cannot be completed. You can try to enable this after shutting down the VMs, and enabling “Nested Virtualization” in the virtualization’s settings. If you can’t do that either (like me), then it’s impossible to continue. This may be due to the fact that Hyper-V requires direct access to these CPU features: SLAT, VMX/SVM, DEP. If the Hypervisor cannot provide that, then there is no way to continue unless you actually have a physical server in your living room, study, or bedroom that runs the same exact operating system. If, however you can enable “Nested Virtualization,” then the rest of the steps are simple, proceed through the wizard like we previously have done with the other two steps, restart the OS if needed, and then you are ready to continue. For me, I will continue on my PC rather than my VM to complete the process. Either way, once complete, the application that you should be looking for is “Hyper-V manager” which looks like this:
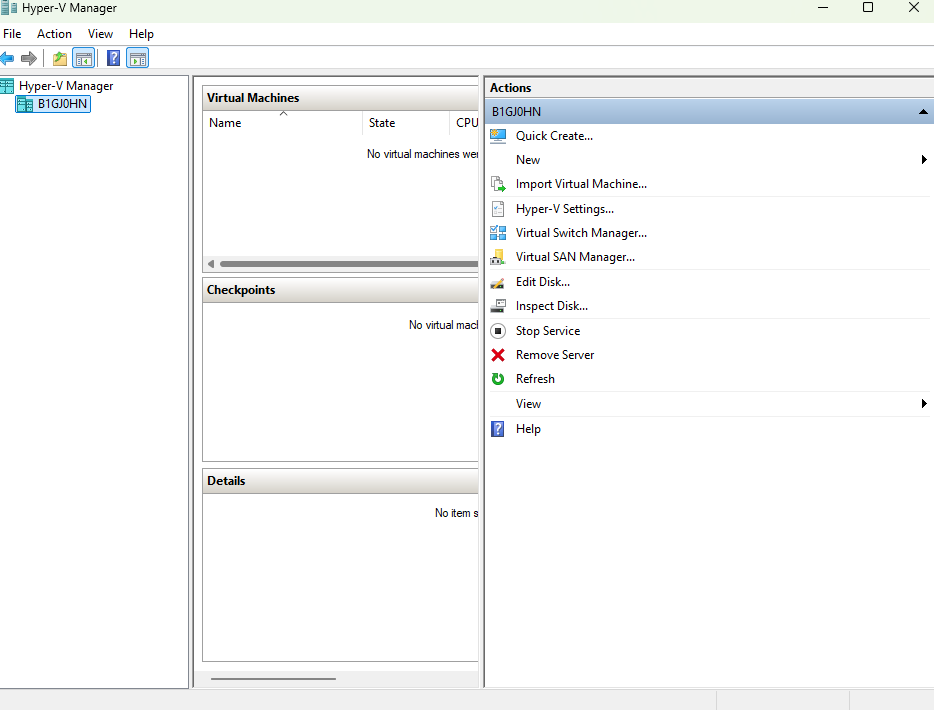
Once booted in, it’s recommended to create a Virtual Switch. To do this click on whatever your servers name is underneath the Hyper-V manager on the left panel, then look to the panel on the right where you will find an option called “Virtual Switch Manager.”
After clicking on “Virtual Switch Manager, you should get a Window that looks like this:
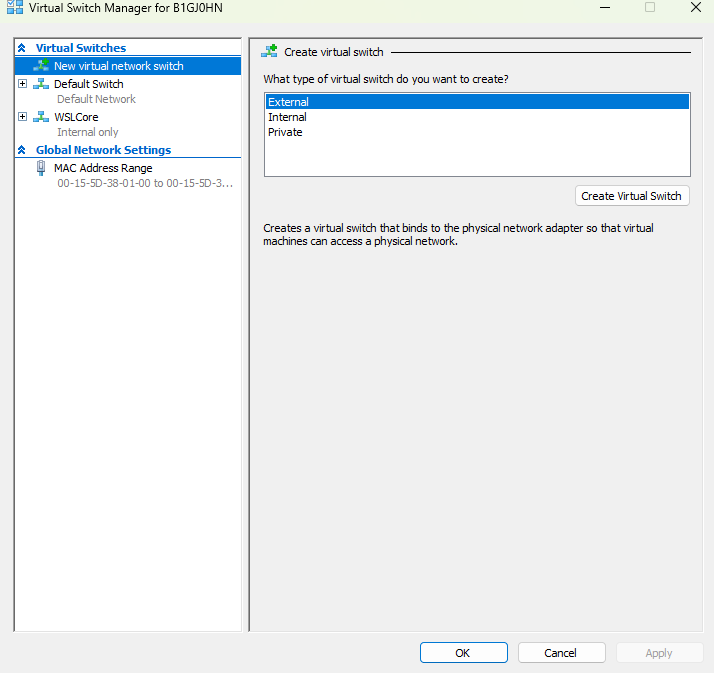
On the left hand side, we obviously want to create a new one; with that being said you could choose “default switch” and hit ok then move on. Think of it as a preconfigured Soho wireless router. As for “WSLCore” this only appears if you have the Windows Subsystem for Linux configured. Only use this option if you intend to work with Linux, but I will not be doing that this lab. Instead I will keep the option on “New virtual Network Switch” so I can choose how they connect to the Network. You will also notice three additional options to the right called “External” “Internal” and “Private.” The difference between the three is as follows: External connects VMs directly to the physical network through your server’s NIC or Network Adapter, Internal allows communication between the host and VMs only (no external network), and Private allows communication only between VMs, not with the host or outside world. Whichever, one you choose is up to you, but most people select External as it’s the best option for production environments, so I will choose that one. Regardless of option, hit the “Create Virtual Switch” button, and your new switch will be created where you can edit various settings to your liking.
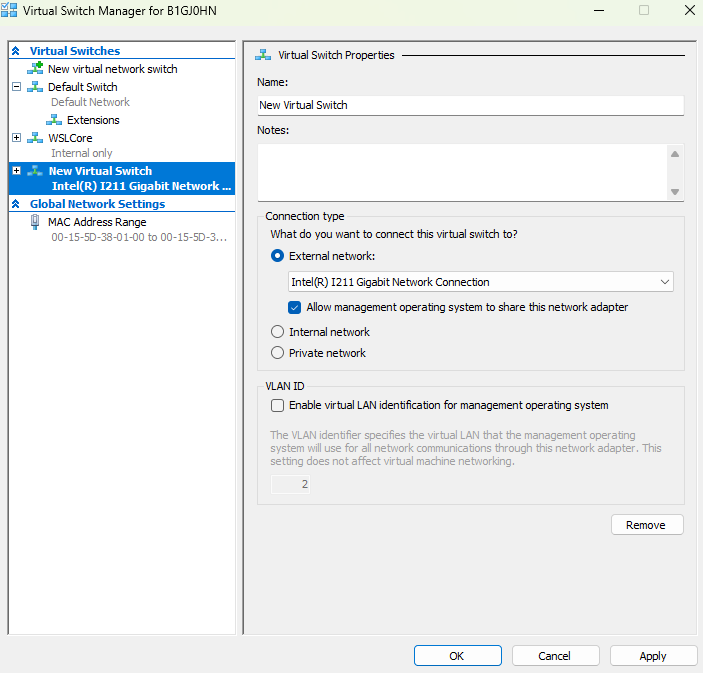
Once you do, you can give it name, leave notes as to what this Switch can or will do, select either “External,” “Internal,” or “Private” again. I’m keeping my option at External so that way I have more freedom for Network options. If you would like to follow my path select whatever NIC or Network Adapter you want the Switch to have, unless you check the box that states “allow management operating system to share this network adapter.” This basically lets Hyper-V know if you would like to have the NIC of whatever your current OS uses can be used for the VM(s) you will create. Im checking that box, and then after that, you can leave the VLAN ID checkbox that says “Enable virtual LAN identification for management operating system” unchecked. This is also optional, but I personally am not checking it because my Network does not have VLANs setup, furthermore, on my home network, I do not think that it is worth it to create VLANs since I have very few devices connected to my network. However in businesses, it may be wise to check that to make it easier to identify the network segments the VM(s) will be on. I will leave that decision up to you, but afterwards click “Apply.” You may get a warning about being disconnected from the Network as this is happening, ignore that warning, and proceed with the creation of the Switch. Once done, click “Ok” and the Window close. Now you are ready to make a Virtual machine or three.
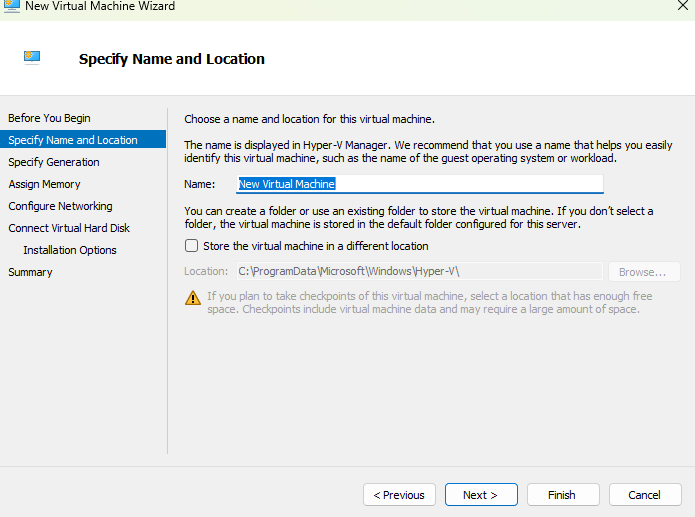
The first thing you should do after this is done is to click on the “New” button followed by the “Virtual Machine” button which will lead you to the “New Virtual Machine Wizard.” which is seen below.

From here if you want to run wild, just click “Finish” and you are done, just be sure to monitor the resources so that either machine does not crash. Otherwise hit next where you choose what to name the Virtual Machine, and where on the machine it will be stored. To change the location, simply check the box titled “Store the virtual machine in a different location.” Once done with this, hit “Next.”
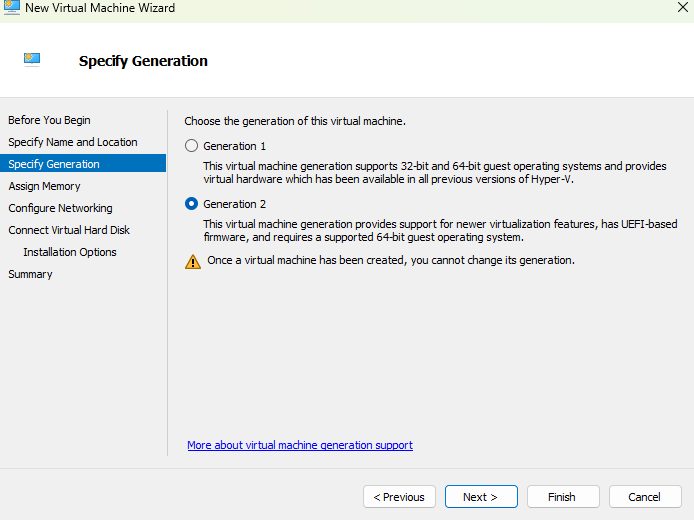
Now you must specify the generation of the VM you want. I will leave that decision up to you, but beware, you cannot change this setting after the VM is created. Once done with this, hit “Next.”
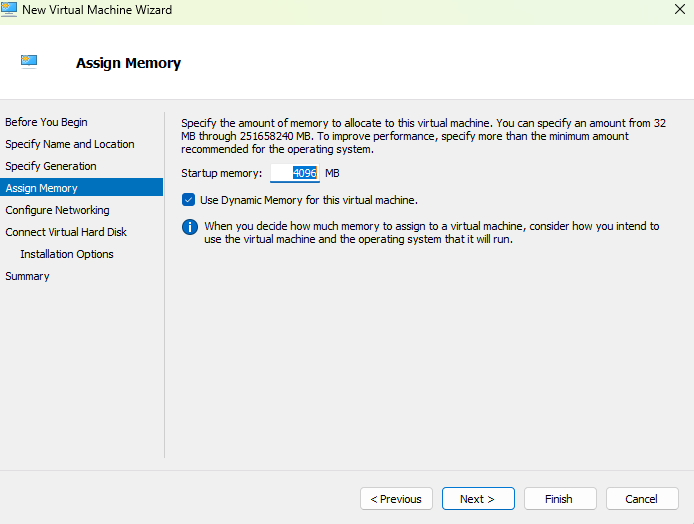
After this, you will be asked how much memory you want on this VM. Remember not to use too much memory. Once done with this, hit “Next.”
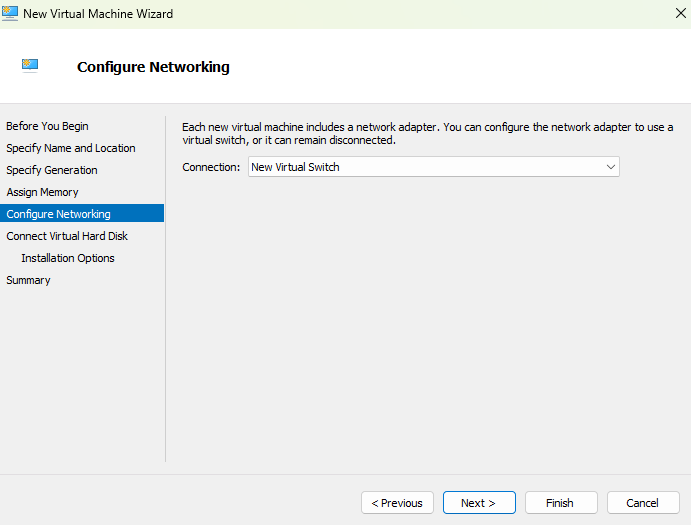
Your next step after this one is to select how you want the machine to be Networked. This is where that virtual switch we created comes in. Select the name of your Switch and hit “next.”
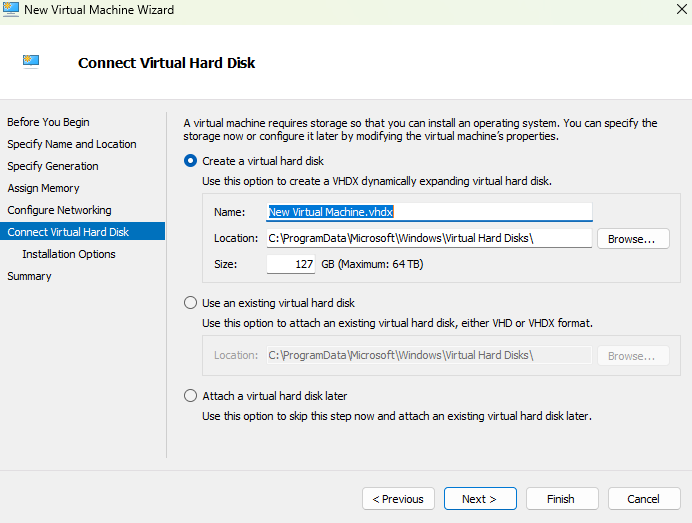
Your next step is to determine the storage on the soon to be available Hard Disk you want. Again, like the memory, keep in mind how many resources you actually have. An option does exist to attatch storage later, but I would not recommend selecting that option due to the ammount of headaches it can present later on. Once done with this, hit “Next.”
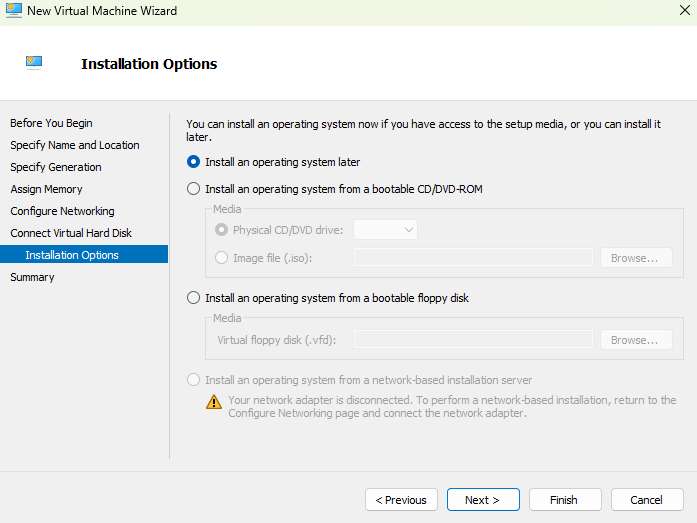
After this, your last step would be to install the OS you want on the VM. You can do this from either a bootable CD/DVD ROM, ISO file, or virtual Floppy Disk. You can even install one through a network based installation server, but that’s only if your virtual Switch is connected to one. Since mine isn’t , we can ignore that option. Once you choose your boot option, hit “Next.”
Afterwards it will show the summary of what we have configured thus far. If you are satisfied with the settings we have configured so far, then feel free to create the Virtual Machine by hitting finish, and voila, your first Hyper V virtual machine is created. Feel free to create more as you see fit, and have fun playing with your VM(s).
Stay tuned to Part 4 where we will be talking about how to set up NTP servers.
Filed under: Labs,Professional Development - @ September 20, 2025 2:26 am