Windows Server 2022 Active Directory Home Lab Part 1: Initial Settings and Active Directory setup.
For my first project in my portfolio. I have decided to work on setting up an AD lab. This will be beneficial to me because learning about this is key to managing IT infrastructure. Below will be images on how I set up this process.
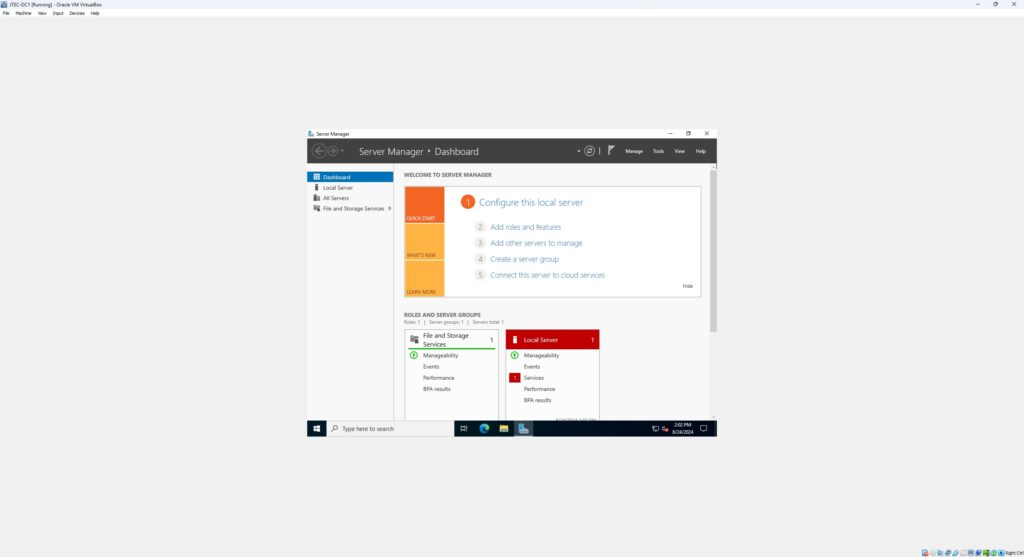
For this lab, as the title demonstrates, I am using Windows Server 2022. Upon installation, the first thing one would come across would be a window like this. We will do some small things on this window with things like configuring roles, then from there we will use the Active Directory Domain Services application.
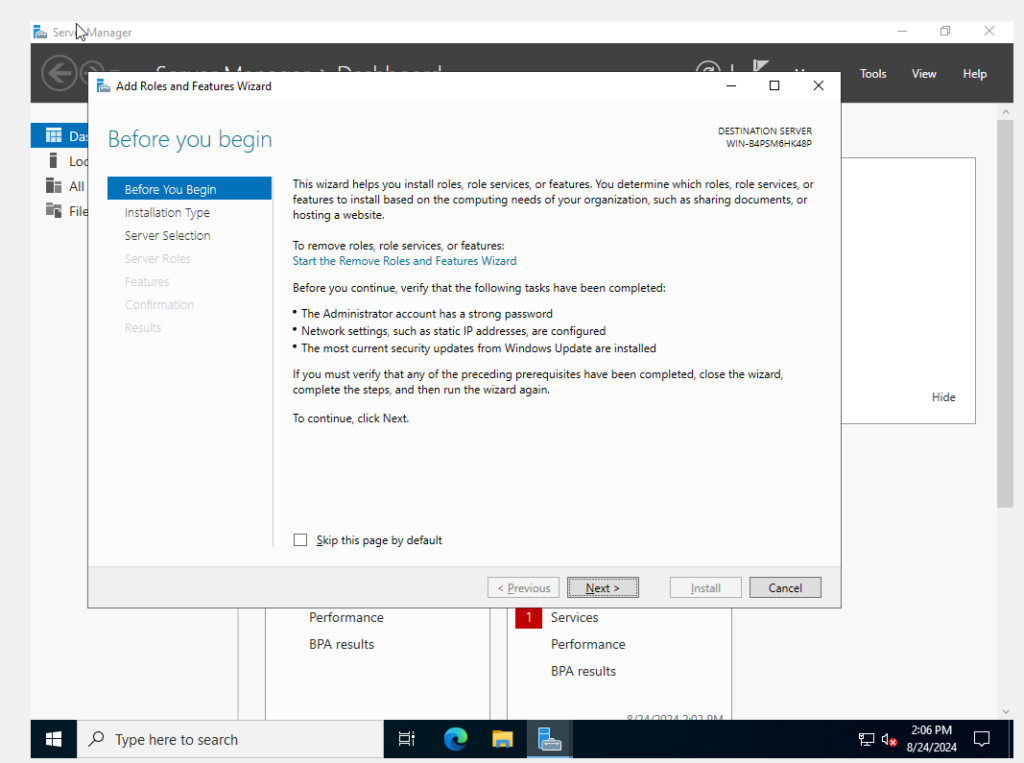
Clicking on “Add Roles and Features” in the first image, doing so would bring you into this window. This is critical for the lab environment. Note that the second point mentions Network settings have to be configured. Up until this point I haven’t done such a thing, so I took a quick break from setting up this lab so I will go into detail on how I set up the Network settings below.
Step 1: I first started by going into the system settings and navigating to the network section. You can also do this by clicking on the Network settings on the bottom right and navigating to the links labeled accordingly or by typing “ncpa.cpl” using the run tool.

Step 2: Before doing anything else, I changed the network access on the Virtual Machine. I did this because for this lab I will be using two virtual machines. Between the two I will need a bridged NIC so they can talk to each other. To set this up, go to settings.
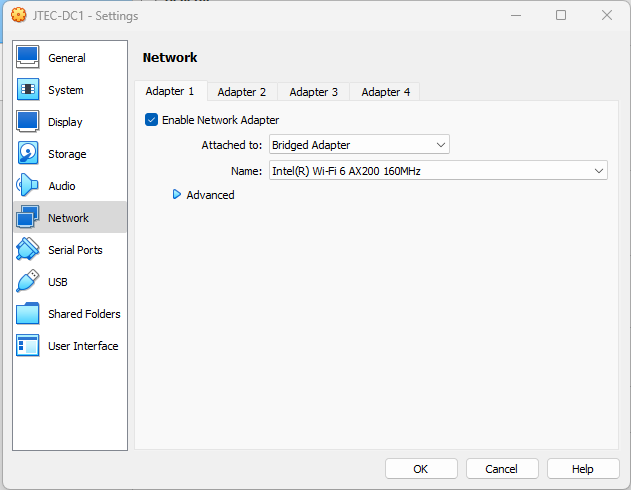
Step 3: By clicking settings, you should be directed to “General.” Go to “Network” and where it says “Attached to:” change it to “Bridged adapter” if it’s not already selected. The name is not important unless you have a specific NIC to select. Do this for the other Virtual Machine. After doing that redirect your attention to step 1. From here I went into “Change Adapter settings” this will help me enter the IP info I need to complete this lab.
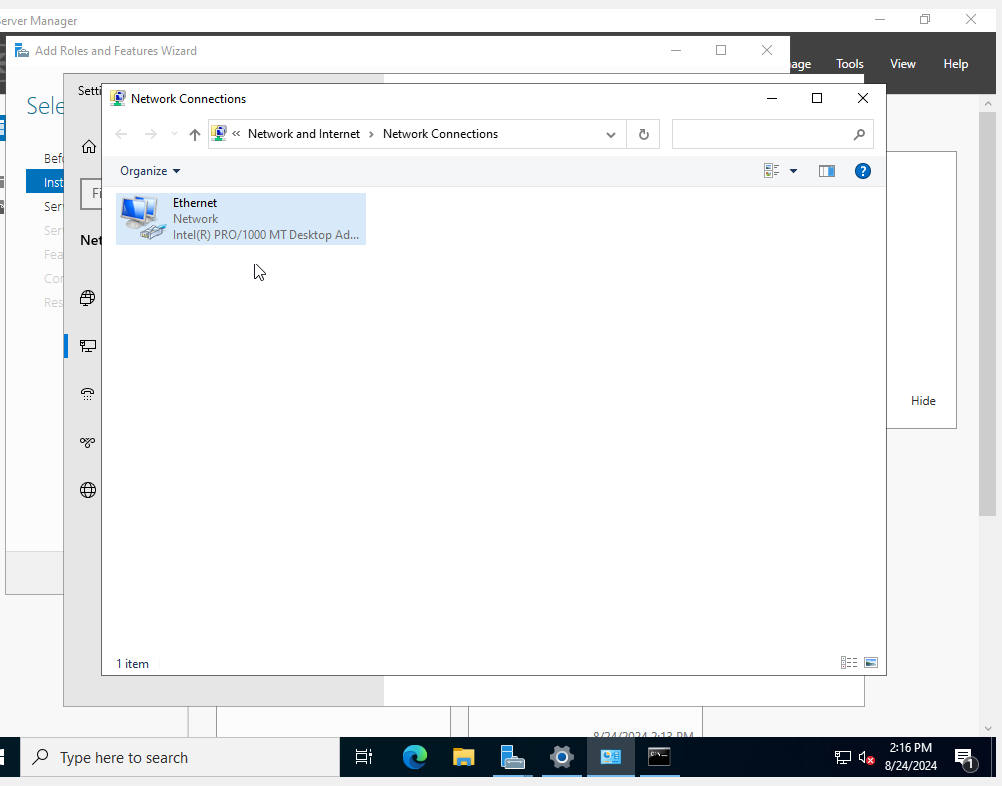
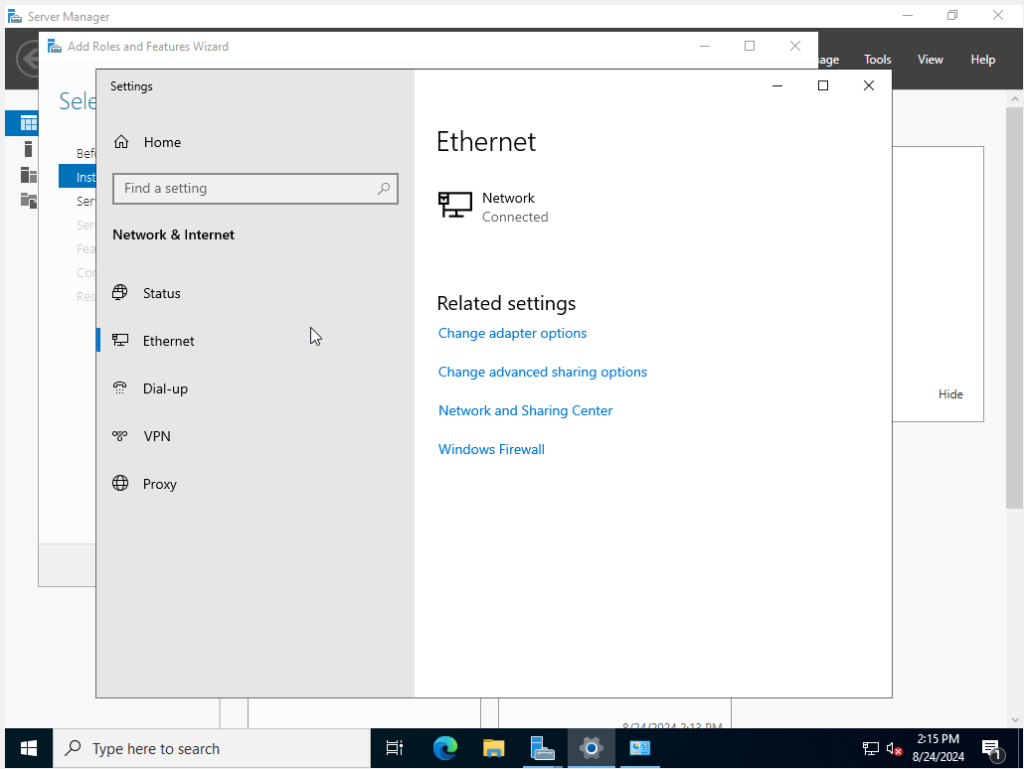
Step 4: After clicking “Change Adapter Settings” I am greeted by this window. Since this is the only Network Option available, I clicked the ethernet option; for the Domain Controller is connected to a virtual NIC.
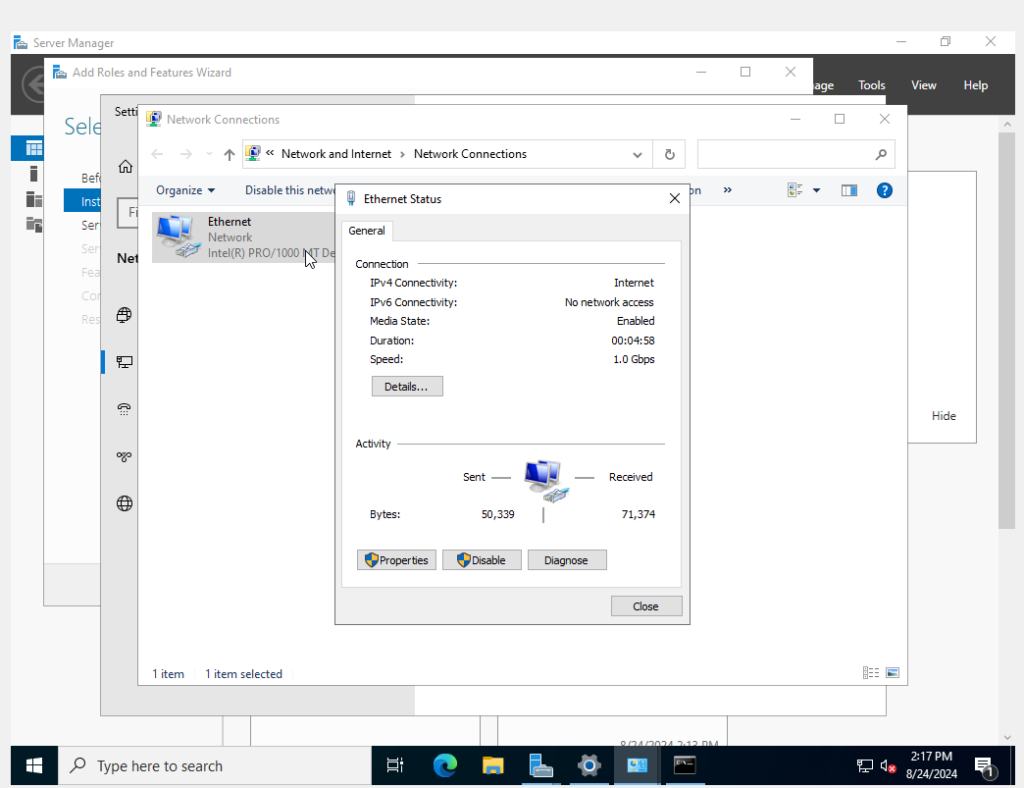
Step 5: From there it leads me to this window. To change the IP settings, I will have to go into the properties area by clicking the “Properties” button.
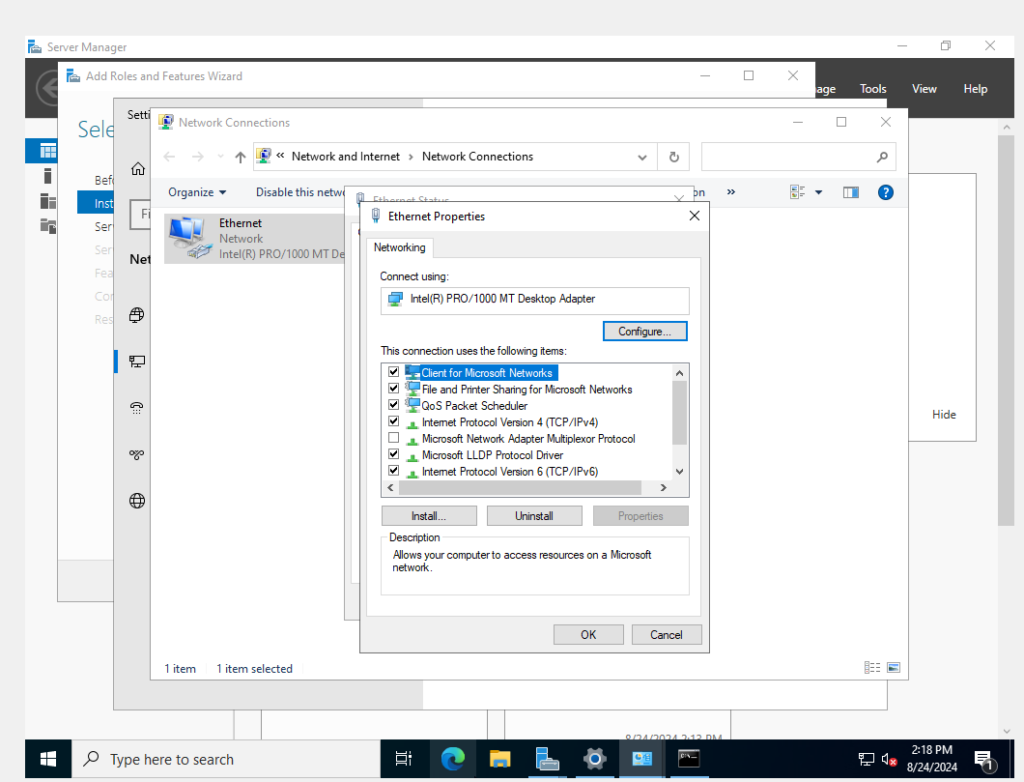
Step 6: Upon doing so I have another Window. Here is a very advanced control panel I can use to control the network. At the time of this snapshot, I didn’t do this, but here I disabled IPv6 since I didn’t really see a need for it as this is just a lab. I clicked on the IPv4 settings from here.
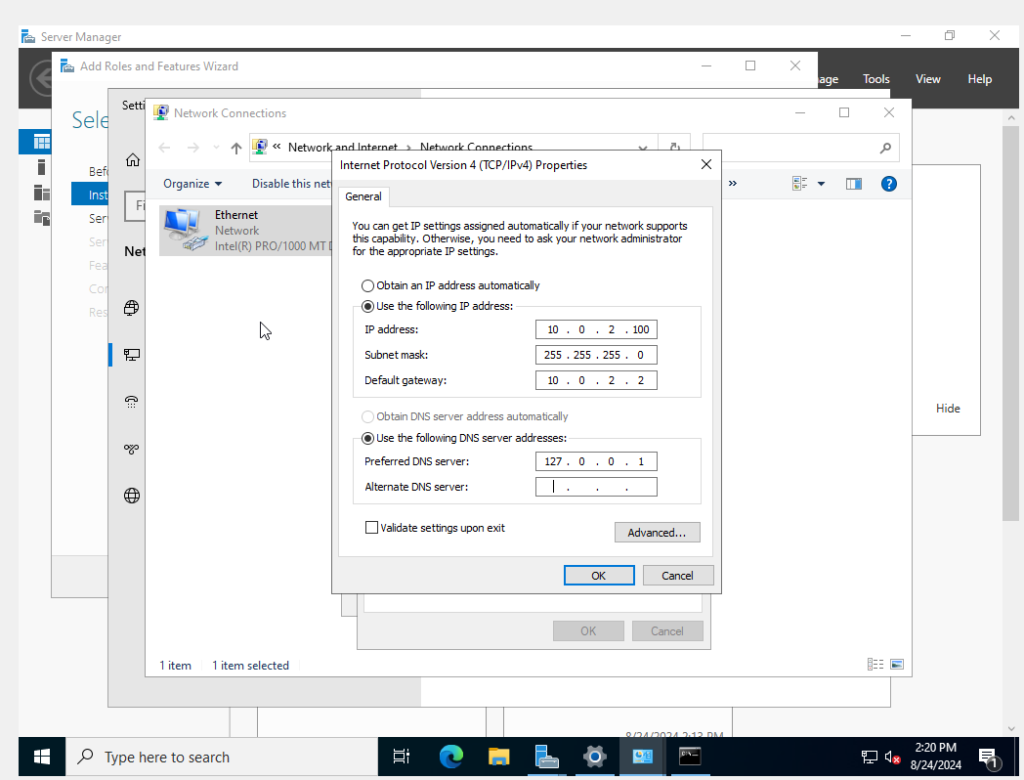
Step 7: And at last, we arrive at the area that allows us to change the IP addresses. Here I entered my LAN ranges and subnet mask which at the time of the snapshot was this. You will also notice I put in a loopback address. This will be important and I will explain later.
Now everything is set up on the Domain Controller side. It’s time to repeat these steps with another Virtual Machine running Windows Enterprise (both enterprise editions of Windows 10 or Windows 11 will work in this lab).
With all of that configuring out of the way we can now resume setting up our domain controller.
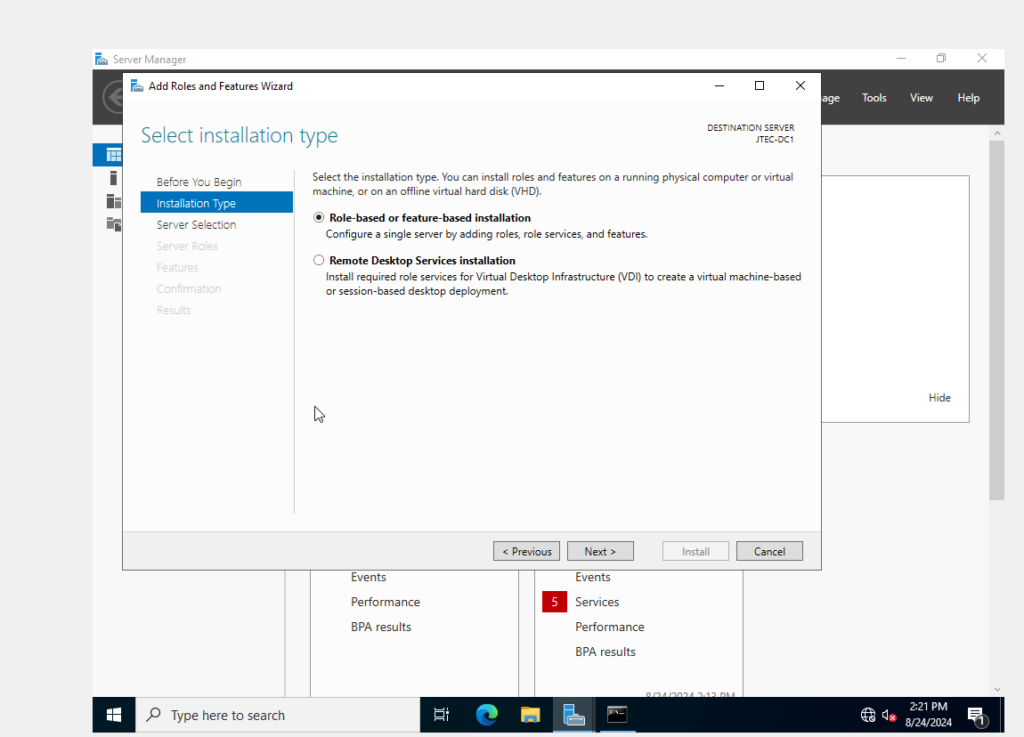
Installation type is key here, but for this lab I chose the first option because I had imagined this lab to fit a network for a small business. Small businesses as far as I know do not use VDI to power employees workstations. I suppose one small business could if they really wanted to but it is also easier to setup by just doing a Role based installation rather than a Remote Desktop Services installation. Once you get passed this window you can set up everything to your liking.
I didn’t feature the settings I chose here yet because I have configured an application that would help me out easily with that, and that application is called Active Directory Domain Services. I should note something really quick before I move on. For some reason the OS that this server is on switched to Windows 2025, but it shouldn’t matter because they layout is directly the same. Anyway to install Active Directory Domain Services, after clicking next in the above image and then selecting the server (there should be only one) named JTEC-DC-1, you should get a windows that looks like this.
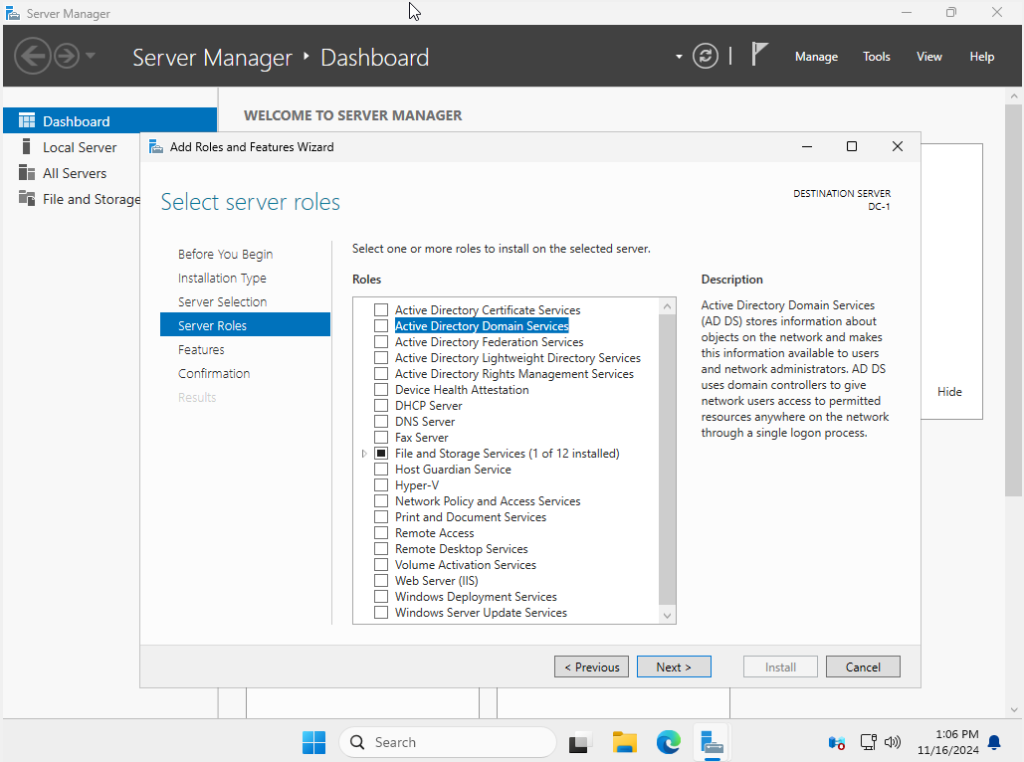
Where it says Active Directory Domain Services, click the box to check it and then you should get a window that looks like this.
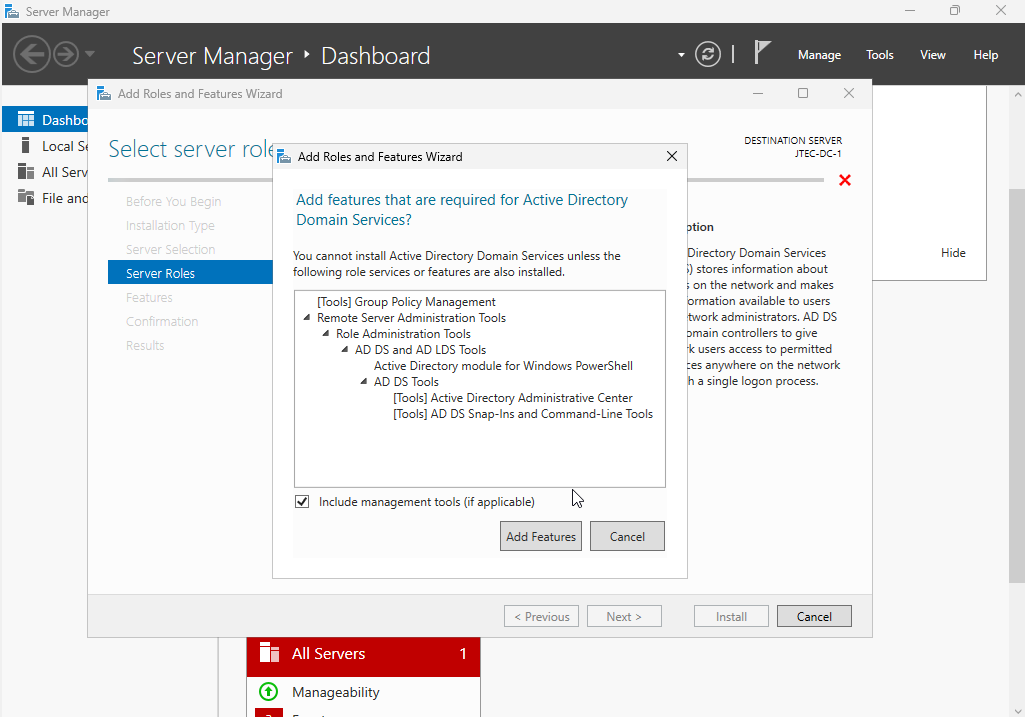
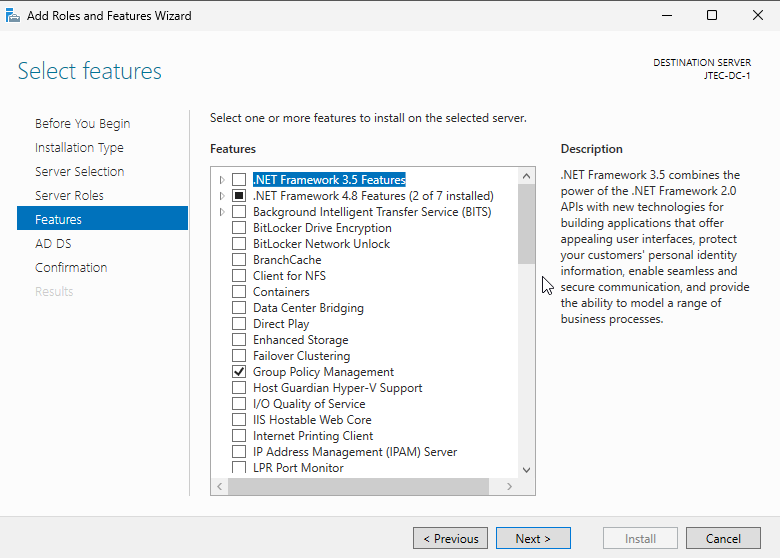
A window similar to this will pop up every time you install a new role. Every time this happens click on “Add Features” and then click “Next.” as soon as this window disappears. The following image will also be the same after you click “Next” the first time. Everything should be left on default although if you feel like you want to add more features then by all means go ahead and install these features, but for this lab, I will leave them on default settings all the time unless noted. After looking at the numerous features, click “Next.”
When you click “Next” you will get a pop up that tells you what the service is. Feel free to read the description then click “Next” again.
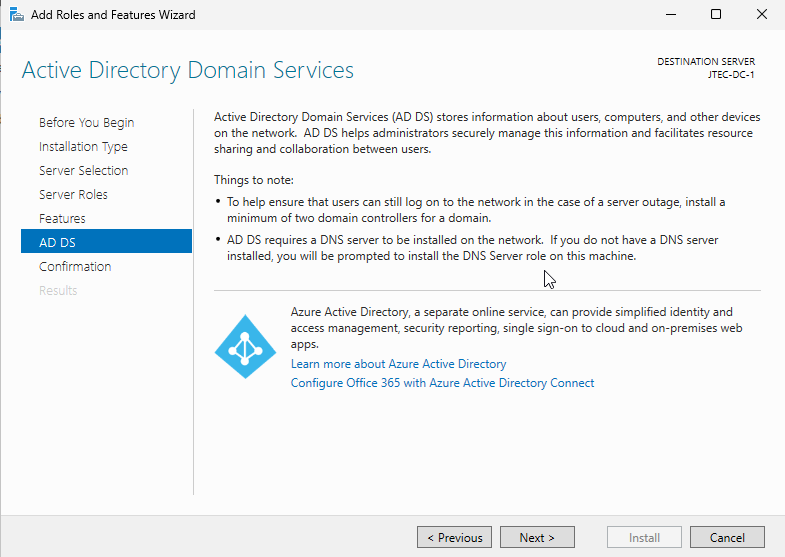
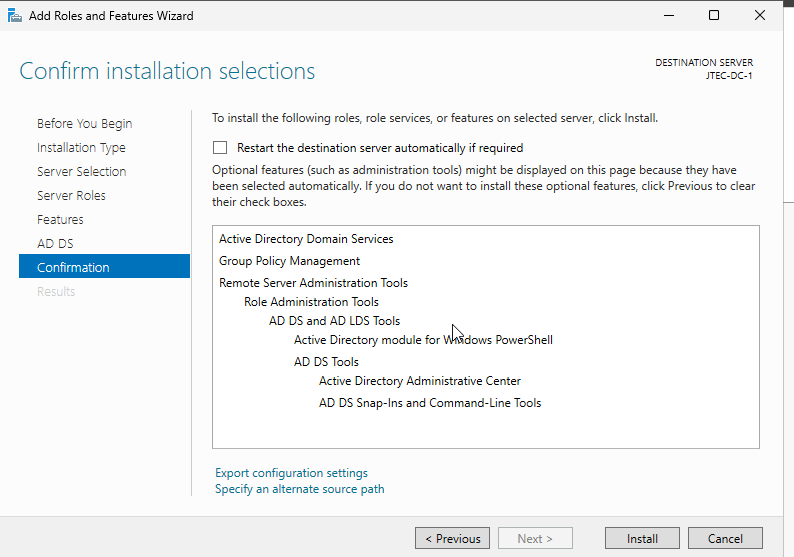
Note the second part that says Active Directory requires a DNS server to be installed, and if it’s not installed already then it will be installed in the process. This is what we want, and will make installation much easier. Click next where you will get a confirmation window which will end the wizard once you click “Install.” You do not have to check the box that says “Restart the destination Server automatically if required.” Installation may take some time, and once done, you can complete the Wizard by hitting the “close” button.
Once done with the wizard above you should get an alert in the top right of the server manager that looks like the image below.
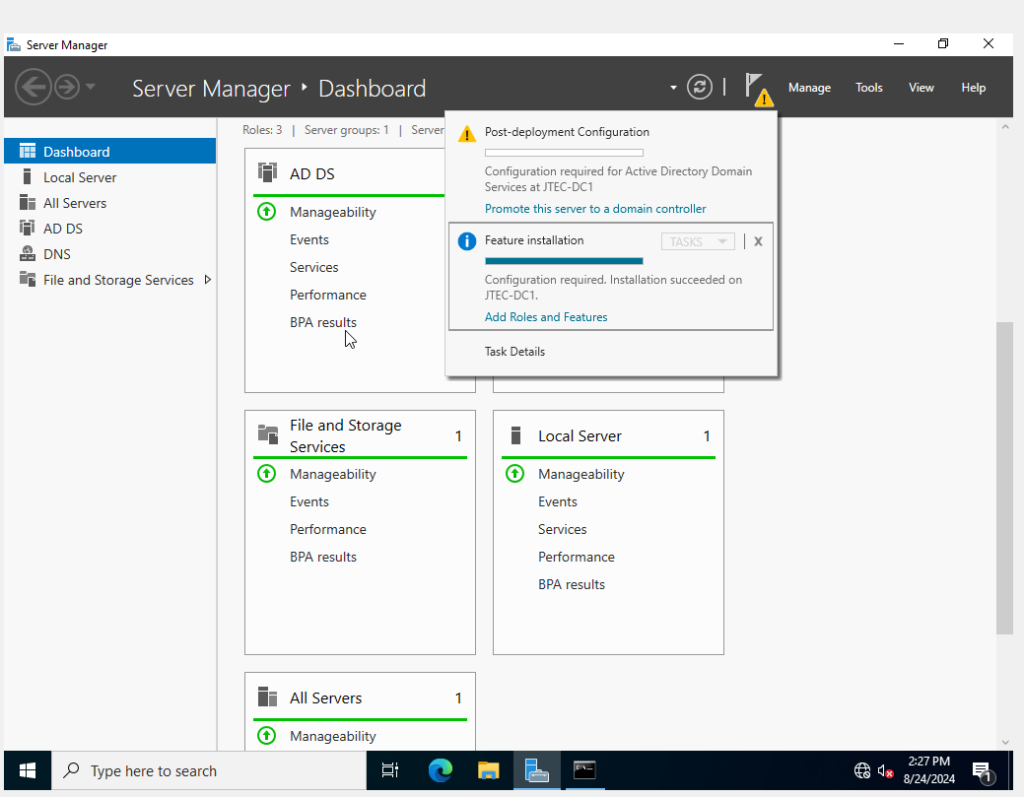
Step 1: This will begin our journey to setting up this application. When you get this alert, click on “Promote this server to a domain controller” after doing that, you should get another Wizard.
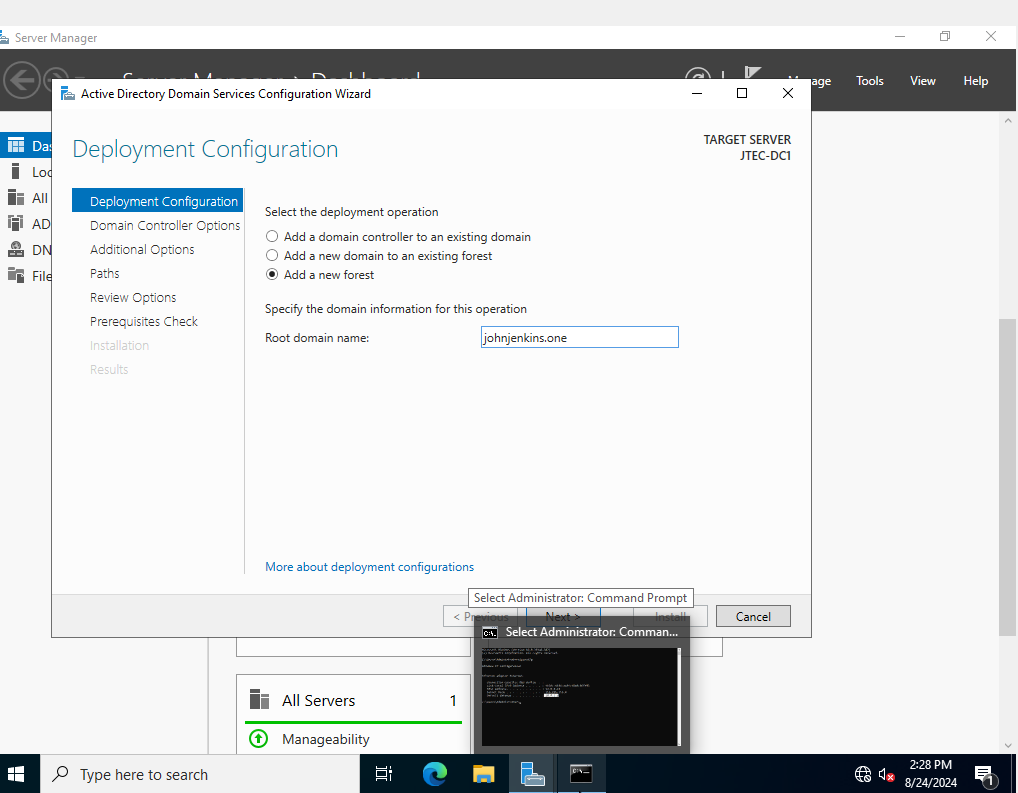
Step 2: The first part of the wizard shows the deployment configuration. Since I am setting up this lab with a domain I had created just days before, I am picking the third option. For any option you are required to enter a domain regardless.
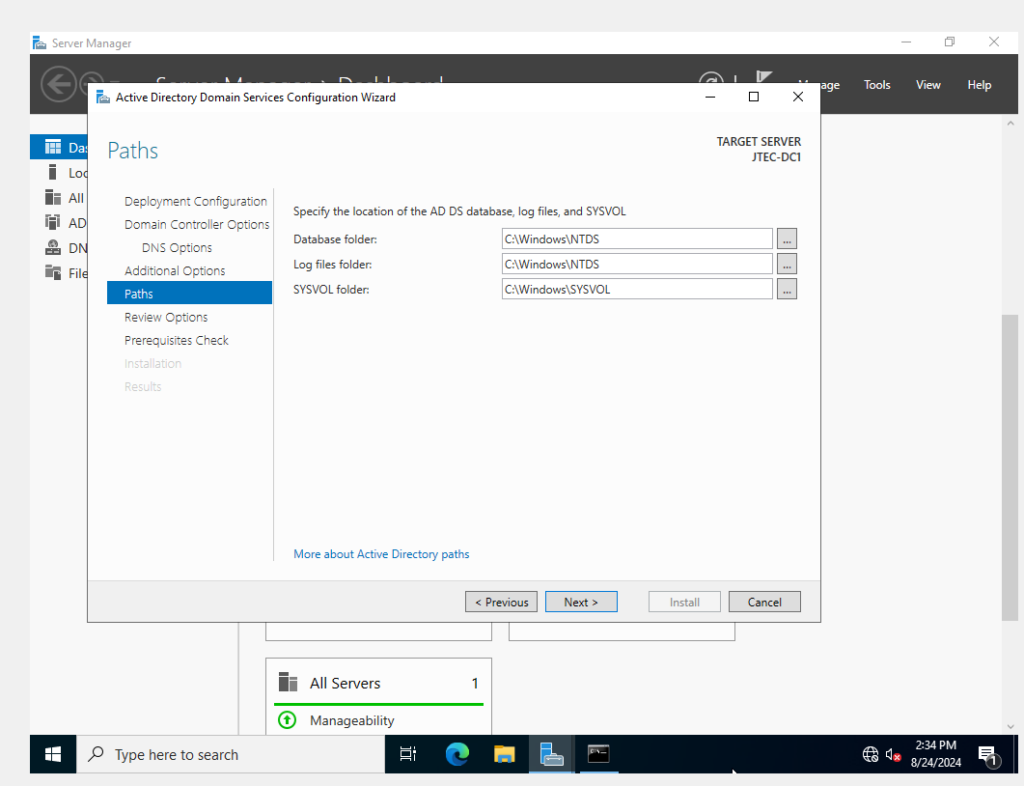
Step 3: Go through the rest of the options until you reach “Paths. “In the image above select your paths. These are the default settings, and I did leave them like that, however, you may want these paths to be different so feel free to change them as you see fit.
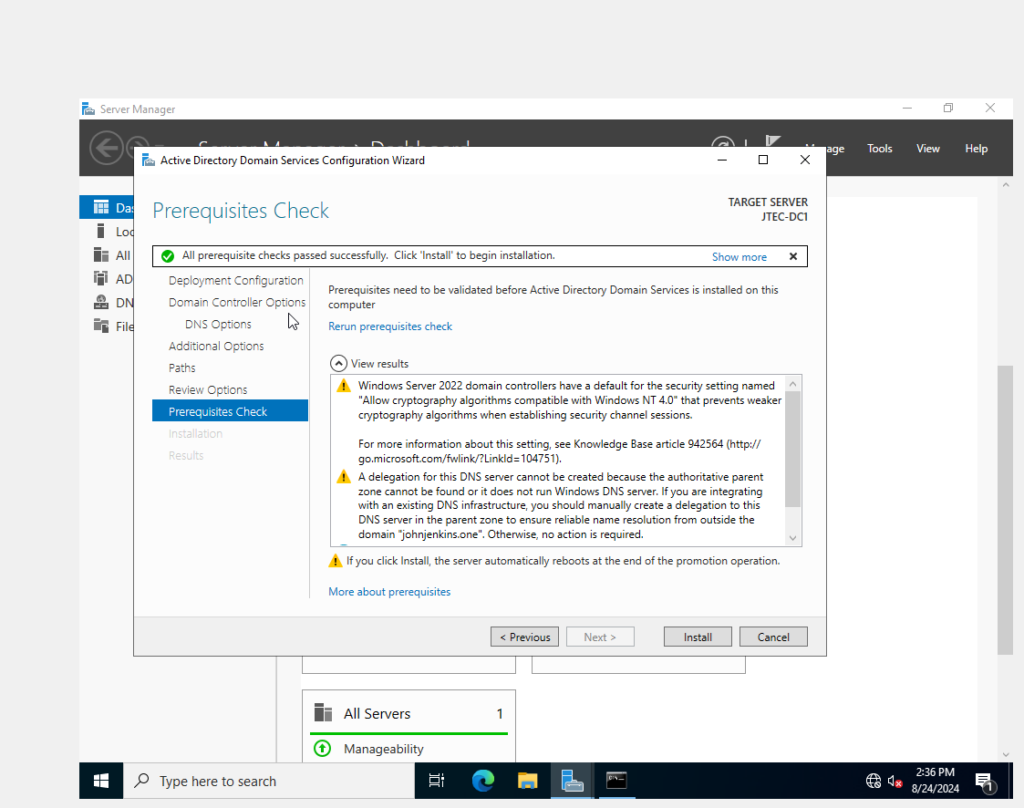
Step 4: Once done, the next important tab is the Prerequisites tab. This will tell you if the OS and the software included meet the prerequisites to install the application. There shouldn’t be any problems, but if there are, review the problems found and solve them. This is the last major hurdle. If no more major hurdles exist, click install and the computer will reboot.
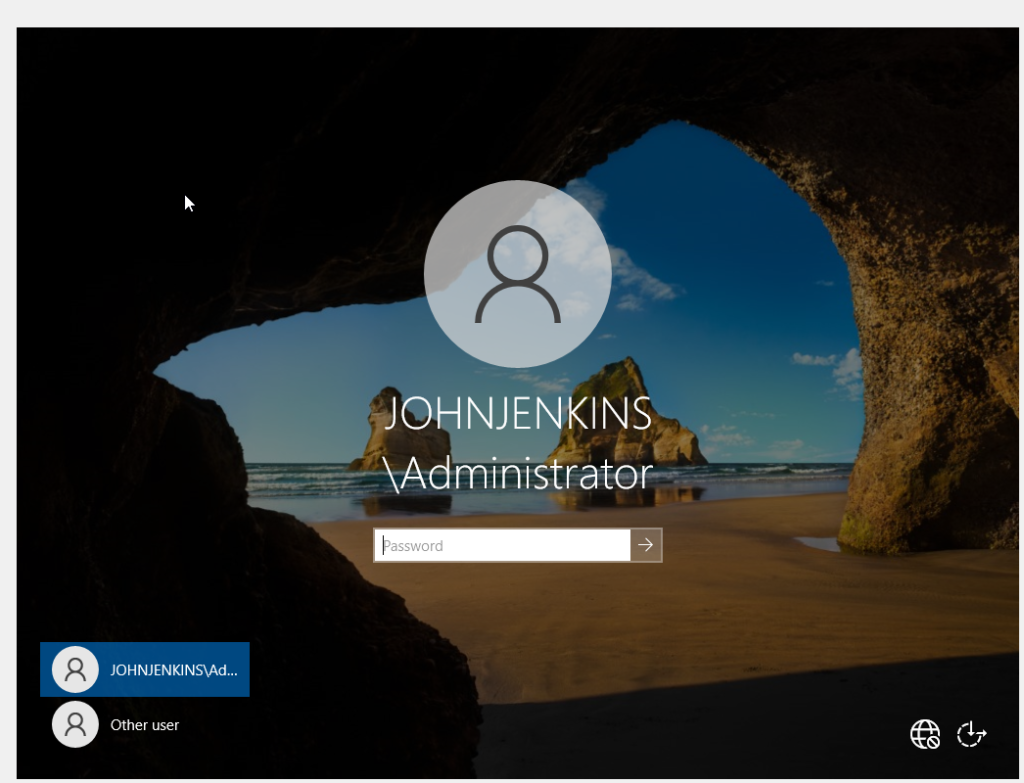
Finally the computer is rebooted. Enter the password that was made for the Admin account. For me I used a website called useapassphrase.com to generate a passphrase and I stored it using the KeePass password manager and when I enter the credentials, I am able to log in. Success!
Now that it’s all set up you will have access to an app called the Active Directory Administrative Center, and this concludes part 1 of the lab. Part 2 will go into setting up a DNS server.
Filed under: Labs - @ July 23, 2025 4:28 pm